

Installing a Mini Tattoo Power Supply can seem like a daunting task, especially if you're new to the world of tattooing. However, with the right guidance and a bit of patience, you'll have your Mini Tattoo Power Supply up and running in no time. As a supplier of high - quality Mini Tattoo Power Supplies, I'm here to walk you through the entire installation process.
Understanding Your Mini Tattoo Power Supply
Before you start the installation, it's crucial to understand what your Mini Tattoo Power Supply is and what it does. A Mini Tattoo Power Supply is a compact device that provides the necessary electrical power to your tattoo machine. It allows you to control the voltage, which in turn affects the speed and depth of the tattoo needle.
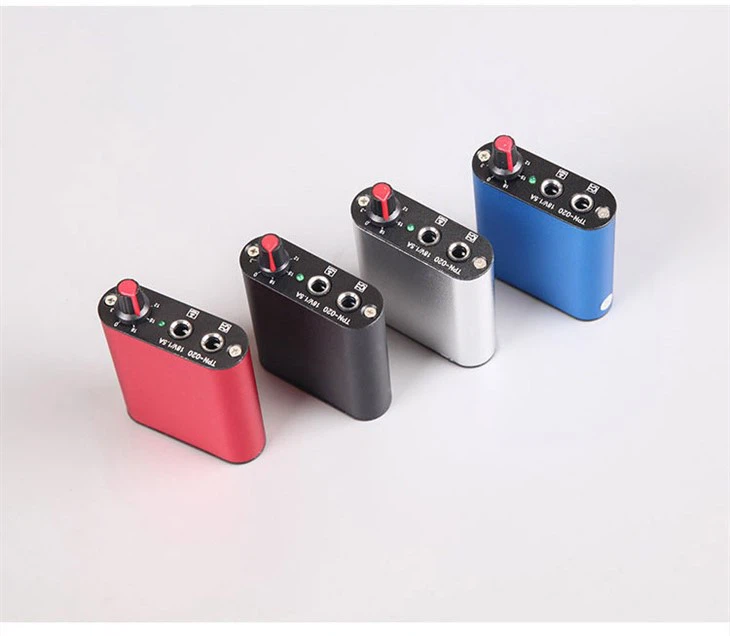

There are different types of Mini Tattoo Power Supplies available in the market, such as Lcd Display Tattoo Power Supply and Rechargeable Tattoo Power Supply. An LCD display power supply gives you a clear visual of the voltage settings, while a rechargeable one offers the convenience of not being tied to a power outlet all the time.
Tools You'll Need
To install your Mini Tattoo Power Supply, you'll need a few basic tools:
- Screwdriver: Depending on the type of power supply, you may need either a Phillips or a flat - head screwdriver to open the casing if necessary.
- Wire cutters/strippers: These are essential for cutting and stripping the wires when connecting the power supply to the tattoo machine.
- Electrical tape: To insulate the wires and prevent any short - circuits.
Step - by - Step Installation Guide
Step 1: Choose a Suitable Location
The first step in installing your Mini Tattoo Power Supply is to choose a suitable location. You want a place that is clean, dry, and away from any sources of heat or moisture. A stable workbench near your tattooing area is an ideal choice. Make sure there is enough space around the power supply for proper ventilation, as overheating can damage the device.
Step 2: Unpack and Inspect
Carefully unpack your Mini Tattoo Power Supply. Check for any visible damage during transit. Inspect all the components, including the power cord, connectors, and the display (if it has one). If you notice any issues, contact your supplier immediately.
Step 3: Connect the Power Cord
If your Mini Tattoo Power Supply is not rechargeable, plug the power cord into a grounded electrical outlet. Make sure the outlet is in good working condition. If you're using a rechargeable power supply, charge it fully before the first use following the manufacturer's instructions.
Step 4: Prepare the Wires
Take the wires that come with your Mini Tattoo Power Supply. If they are not pre - cut to the appropriate length, use your wire cutters to trim them. Then, use the wire strippers to remove about half an inch of insulation from the ends of the wires.
Step 5: Connect the Power Supply to the Tattoo Machine
Locate the connectors on both the Mini Tattoo Power Supply and the tattoo machine. Match the positive (+) and negative (-) terminals correctly. Usually, the positive wire is red and the negative wire is black. Insert the stripped ends of the wires into the corresponding connectors and tighten them securely. You can use electrical tape to wrap around the connections for extra security.
Step 6: Test the Connection
Once the connections are made, turn on the Mini Tattoo Power Supply. Set the voltage to a low setting, around 4 - 5 volts. Gently press the foot pedal (if your setup includes one) and observe the movement of the tattoo machine's needle. If the needle moves smoothly, the connection is successful. If not, double - check all the connections and make sure the power supply is functioning properly.
Step 7: Adjust the Settings
Now that you've confirmed the connection, you can start adjusting the voltage settings according to your tattooing needs. For lining, you may want a higher voltage, around 7 - 9 volts, while for shading, a lower voltage of 5 - 7 volts is usually sufficient. Use the controls on your Mini Tattoo Power Supply to make these adjustments.
Troubleshooting
Even after following all the steps correctly, you may encounter some issues. Here are some common problems and their solutions:
- No power: Check if the power cord is properly plugged in and the outlet is working. If it's a rechargeable power supply, make sure it's charged.
- Needle not moving: Check the connections between the power supply and the tattoo machine. Make sure the terminals are correctly matched and tightened.
- Overheating: Ensure that the power supply has proper ventilation. If it continues to overheat, turn it off immediately and contact your supplier.
Maintenance Tips
To keep your Mini Tattoo Power Supply in good working condition, follow these maintenance tips:
- Keep it clean: Wipe the power supply with a dry cloth regularly to remove dust and debris.
- Store properly: When not in use, store the power supply in a cool, dry place.
- Check the connections: Periodically inspect the wire connections for any signs of wear or looseness.
Conclusion
Installing a Mini Tattoo Power Supply is a relatively straightforward process if you follow the steps outlined above. As a supplier, we are committed to providing you with high - quality products and the support you need. If you have any further questions about the installation, operation, or maintenance of your Mini Tattoo Power Supply, don't hesitate to reach out to us.
Whether you're a professional tattoo artist looking to upgrade your equipment or a beginner just starting out, our Mini Tattoo Power Supply is a great choice. We also offer a wide range of other power supplies like Lcd Display Tattoo Power Supply and Rechargeable Tattoo Power Supply.
If you're interested in purchasing our products or have any inquiries about our Mini Tattoo Power Supplies, we encourage you to contact us for a procurement discussion. We'll be more than happy to assist you in finding the perfect power supply for your tattooing needs.
References
- Tattoo Equipment Manuals: Most manufacturers provide detailed installation and operation instructions in their product manuals.
- Industry Forums: Online tattooing forums are a great source of information where experienced tattoo artists share their knowledge and tips.