

Cleaning a rotary tattoo kit is a crucial process that not only ensures the longevity of the equipment but also maintains a high standard of hygiene for both the tattoo artist and the client. As a supplier of rotary tattoo kits, I understand the importance of providing clear guidance on how to properly clean these kits. In this blog, I will walk you through the step-by-step process of cleaning a rotary tattoo kit, highlighting the key points and best practices along the way.
Why Cleaning Your Rotary Tattoo Kit is Important
Before delving into the cleaning process, it's essential to understand why cleaning your rotary tattoo kit is so important. Firstly, maintaining a clean tattoo kit is crucial for preventing the spread of infections. Tattooing involves breaking the skin, which creates an entry point for bacteria and other pathogens. If the tattoo kit is not properly cleaned, these pathogens can be transferred from one client to another, leading to serious health risks.
Secondly, regular cleaning helps to preserve the functionality and performance of the tattoo kit. Over time, ink, blood, and other debris can accumulate inside the tattoo machine, affecting its smooth operation. By cleaning the kit regularly, you can prevent clogs and ensure that the machine continues to function optimally.
Finally, a clean tattoo kit reflects positively on your professionalism as a tattoo artist. Clients are more likely to trust an artist who takes the time to maintain a clean and hygienic workspace. By demonstrating your commitment to cleanliness, you can build a strong reputation and attract more clients.
Gathering the Necessary Supplies
Before you start cleaning your rotary tattoo kit, you will need to gather the necessary supplies. Here's a list of items you will need:
- Disposable gloves: To protect your hands from ink, blood, and cleaning chemicals.
- Disinfectant solution: A hospital-grade disinfectant is recommended for cleaning tattoo equipment. Make sure to choose a disinfectant that is effective against a wide range of pathogens, including bacteria, viruses, and fungi.
- Cleaning brushes: Soft-bristled brushes are ideal for cleaning the intricate parts of the tattoo machine. You can use a variety of brush sizes to clean different areas of the kit.
- Cotton swabs: These are useful for cleaning hard-to-reach areas and removing small amounts of debris.
- Paper towels or lint-free cloths: For drying the equipment after cleaning.
- Ultrasonic cleaner (optional): An ultrasonic cleaner can be a valuable tool for deep cleaning the tattoo machine. It uses high-frequency sound waves to remove dirt and debris from the equipment.
Step-by-Step Cleaning Process
Step 1: Prepare the Workspace
Before you start cleaning the tattoo kit, it's important to prepare a clean and organized workspace. Lay down a disposable paper towel or a clean cloth to protect the surface from spills and debris. Make sure the area is well-ventilated to avoid inhaling fumes from the disinfectant solution.
Step 2: Disassemble the Tattoo Kit
Carefully disassemble the rotary tattoo kit into its individual components. This typically includes the tattoo machine, tubes, needles, grips, and power supply. Refer to the manufacturer's instructions for specific disassembly guidelines, as different kits may have different disassembly procedures.
Step 3: Dispose of Used Needles and Tubes
Used needles and tubes should be disposed of immediately after each use. Place them in a sharps container to prevent accidental needle sticks. Needles and tubes are single-use items and should never be reused, even after cleaning.
Step 4: Clean the Tattoo Machine
Start by wiping down the exterior of the tattoo machine with a paper towel or a lint-free cloth dampened with the disinfectant solution. Pay special attention to areas that come into contact with the client's skin, such as the grip and the needle bar.
Next, use a cleaning brush to clean the interior of the tattoo machine. Gently brush the motor, gears, and other moving parts to remove any ink, blood, or debris. Be careful not to damage the delicate components of the machine.
If you have an ultrasonic cleaner, you can place the disassembled parts of the tattoo machine in the cleaner for a more thorough cleaning. Fill the ultrasonic cleaner with the appropriate amount of water and cleaning solution, and follow the manufacturer's instructions for operation. After the cleaning cycle is complete, remove the parts from the cleaner and rinse them thoroughly with clean water.
Step 5: Clean the Tubes and Grips
Soak the tubes and grips in the disinfectant solution for the recommended amount of time. Use a cleaning brush to scrub the inside of the tubes to remove any ink or debris. Rinse the tubes and grips thoroughly with clean water to remove any traces of the disinfectant solution.
Step 6: Clean the Needle Bar and Tips
The needle bar and tips should be cleaned carefully to ensure proper functioning of the tattoo machine. Use a cotton swab dipped in the disinfectant solution to clean the needle bar and the tips. Make sure to remove any ink or debris that may have accumulated on the surface.
Step 7: Rinse and Dry the Components
After cleaning each component, rinse it thoroughly with clean water to remove any remaining disinfectant solution. Use a paper towel or a lint-free cloth to dry the components completely. Make sure there is no moisture left on the equipment, as this can lead to rust and corrosion.
Step 8: Reassemble the Tattoo Kit
Once all the components are dry, carefully reassemble the rotary tattoo kit. Make sure all the parts are properly aligned and tightened. Refer to the manufacturer's instructions for specific reassembly guidelines.
Step 9: Lubricate the Tattoo Machine (if necessary)
Some tattoo machines may require lubrication to ensure smooth operation. Check the manufacturer's instructions to see if your tattoo machine needs lubrication. If so, apply a small amount of lubricant to the moving parts of the machine, such as the motor and the gears.
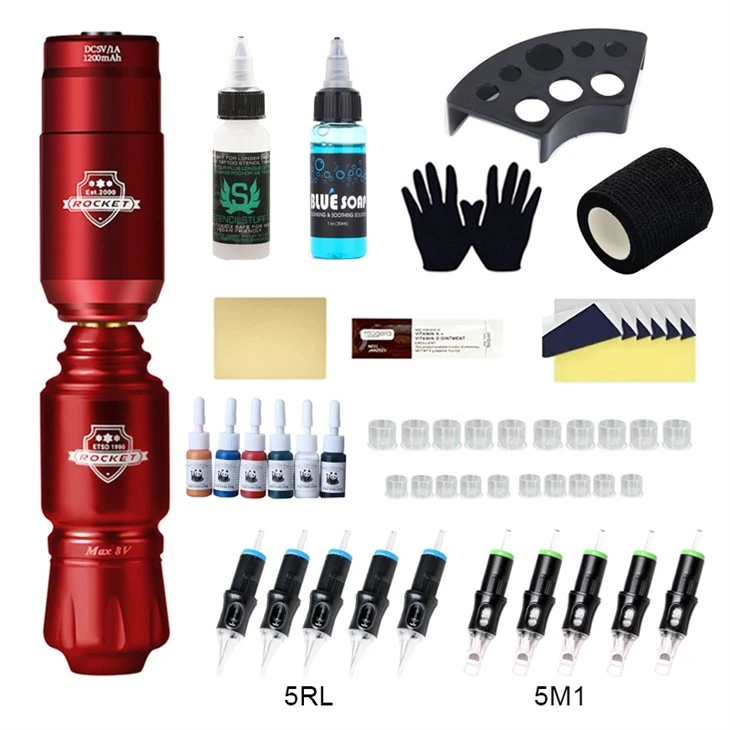

Step 10: Store the Cleaned Tattoo Kit
After the tattoo kit is reassembled and lubricated (if necessary), store it in a clean and dry place. You can use a protective case or a storage container to keep the kit organized and protected.
Tips for Maintaining a Clean Tattoo Kit
- Clean the kit after each use: To prevent the buildup of ink, blood, and debris, it's important to clean the tattoo kit after each use. This will help to maintain the functionality and performance of the equipment.
- Follow the manufacturer's instructions: Always refer to the manufacturer's instructions for specific cleaning and maintenance guidelines. Different tattoo kits may have different cleaning requirements, so it's important to follow the recommended procedures.
- Use high-quality supplies: Invest in high-quality cleaning supplies, such as hospital-grade disinfectants and soft-bristled brushes. Using low-quality supplies may not effectively clean the equipment and can potentially damage the kit.
- Regularly inspect the equipment: Regularly inspect the tattoo kit for signs of wear and tear. Replace any damaged or worn-out components immediately to ensure the safety and performance of the equipment.
- Keep a cleaning log: Keeping a cleaning log can help you track the cleaning schedule and ensure that the tattoo kit is cleaned regularly. This can also be useful for demonstrating your commitment to cleanliness to clients and regulatory authorities.
Conclusion
Cleaning a rotary tattoo kit is an essential part of maintaining a safe and hygienic tattooing environment. By following the steps outlined in this blog, you can ensure that your tattoo kit is properly cleaned and maintained. Remember to always use high-quality supplies, follow the manufacturer's instructions, and dispose of used needles and tubes properly. By taking these precautions, you can protect the health and safety of your clients and build a strong reputation as a professional tattoo artist.
If you're in the market for a high-quality rotary tattoo kit, we offer a range of products to suit your needs. Check out our Coreless Precision Motor Rotary Tattoo Kits and Complete Rotary Tattoo Machine Kit for more information. If you have any questions or would like to discuss your specific requirements, please feel free to contact us for procurement and further discussions.
References
- American Academy of Dermatology. (n.d.). Safe tattooing and body piercing. Retrieved from [Website URL]
- Centers for Disease Control and Prevention. (n.d.). Infection prevention and control in tattooing and body piercing. Retrieved from [Website URL]
- International Association of Tattoo Artists. (n.d.). Best practices for tattoo artists. Retrieved from [Website URL]